
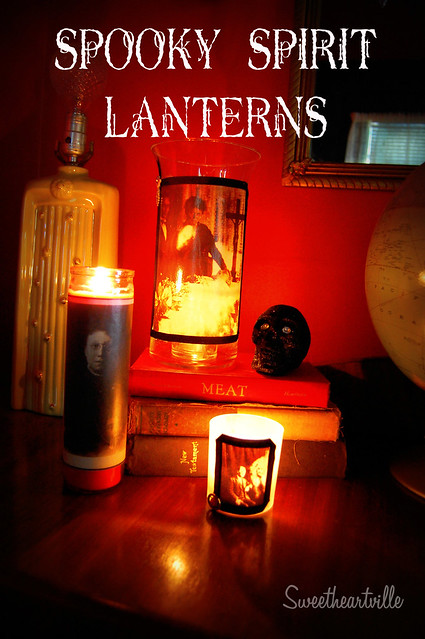
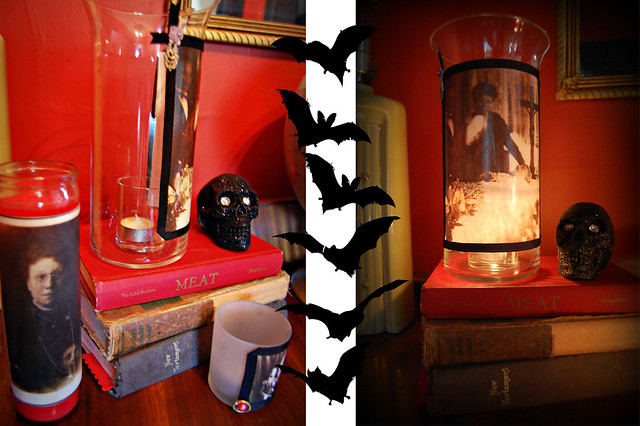
Halloween is nearly upon us, but there's still time for some spooky craft projects, and I've got one to share with you today. It doesn't get much spookier than these "Spirit Lanterns", and they couldn't be easier to make.
I have imagined glowing candlelight flickering behind creepy old-timey spirit photography for a long time, but my printer refusing to print on vellum made my first try at these two years ago a bust. This year, I decided good ol' Mod Podge was the trick to making my vision come to life. Want to see how I did it?
First, you'll need some images. You can use any spooky photo or clip art you'd like, but I found this spirit photography set from the National Media Museum on Flickr, for use under a Creative Commons License.
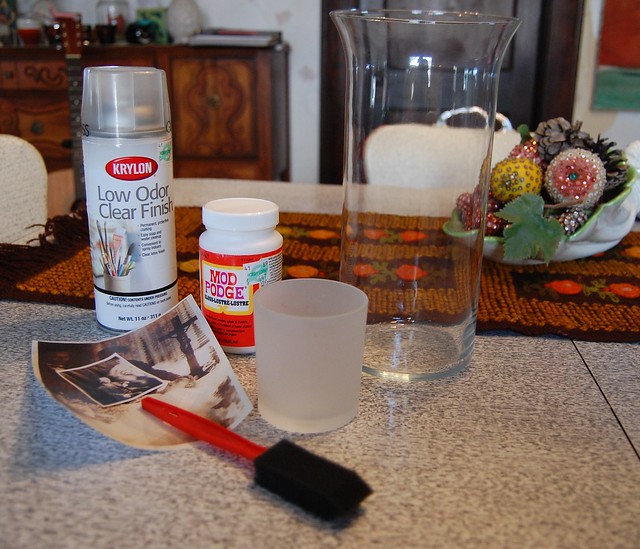
Supplies needed:
vintage images
clear acrylic spray
assorted glass candle containers
Mod Podge
paint brushes
ribbon or trim (optional)
buttons or other embellishments (optional)
tacky glue (optional)
vintage images
clear acrylic spray
assorted glass candle containers
Mod Podge
paint brushes
ribbon or trim (optional)
buttons or other embellishments (optional)
tacky glue (optional)
Before printing, you'll want to first use your photo editing software to resize your images to fit the container you've chosen. I just used regular printer paper. (Photo paper is likely to be too stiff to decoupage, and might not allow the glow of the candlelight to be seen as easily.) If you have an inkjet printer, as I do, you'll need to spray your printed photos with a few coats of clear acrylic spray (outside!) and let them dry thoroughly so that the ink doesn't bleed when you apply the Mod Podge.
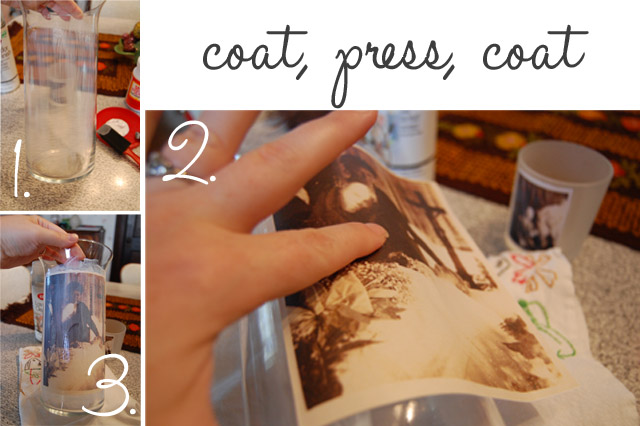
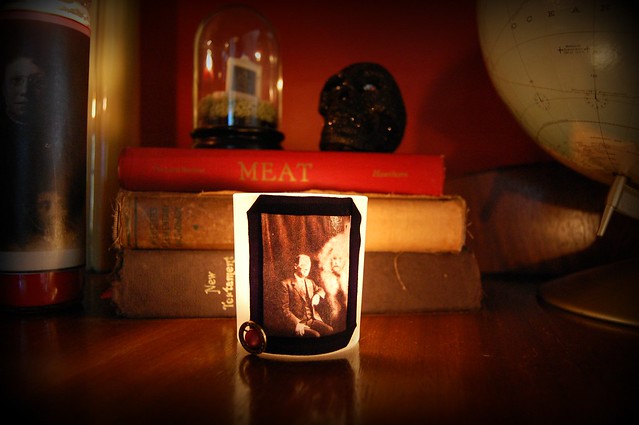
You can use any type of heat safe glass container you wish. I used a vase I had on hand and a recycled frosted glass votive I had washed and saved. I have found a folded kitchen towel to be a great help when working with glass containers. Begin by applying a thin, even coat of Mod Podge to the container with a paintbrush. Place your prepared image on the wet glue, and press the air bubbles out carefully beginning in the center and working your way out toward the edges. After your image is adhered, paint another thin coat of Mod Podge over the top of your image.
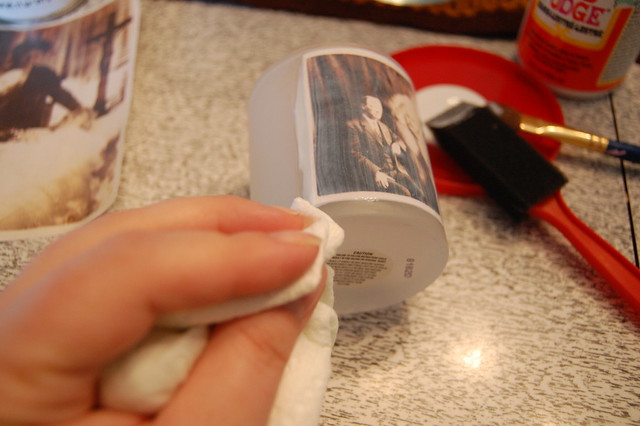
Before the Mod Podge dries, you may want to clean away the excess from around your image using the corner of a wet paper towel.
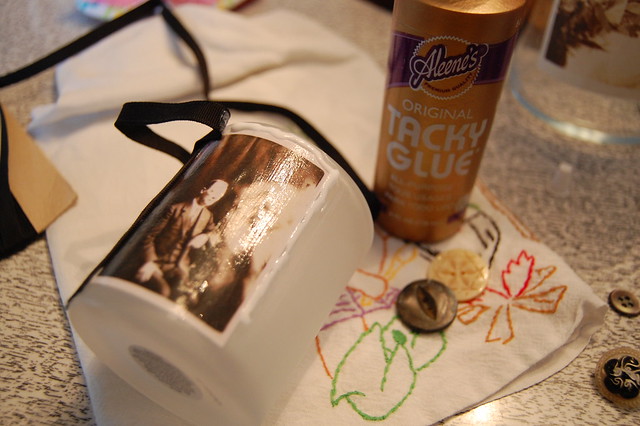
You can stop here, if you'd like, but I chose to cover the slightly messy edges with some vintage black grosgrain ribbon I had, adding an old button where the ends of the ribbon met on one, and a piece of an old earring and a tiny vintage millinery flower on the other. I also glued an image to a glass prayer candle that I had using Mod Podge, but I chose not to coat the top, so as to keep the edges neat and clean. It's not quite as glossy as the others, but you may choose to do the same and eliminate the need for trim if you'd prefer a cleaner look. Alternately, you can get close to the same effect by simply printing your image onto sticker paper and avoid the Mod Podge mess altogether. Your choice!
What sort of Halloween crafts have you been making?
5 comments:
Super creepy and cool! Love these! Yesterday Audrey and I hotglued popsicle sticks to foam grave stones we got at the dollar store and turned our flower bed into a graveyard :D
These are very cool!
We have had a severe lack of Halloween crafts and decorations so far this year maybe we will have to start with this project.
This is a good idea for the vintage images. It adds a touch of spookiness to the candles.
Processing the image can be difficult. This is especially true if you don't have the vintage photos to start with.
For some obscure reason, I don't feel like waking up in the middle of the night only to see those spooky lanterns lighting up my night. I would be freaking hysterical!
Post a Comment